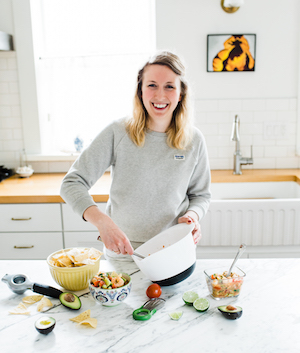
We are excited to start our four-part Food Photography Series with Rebecca Clyde! Follow along for the next 4 weeks as Rebecca shares how she became a food photographer, tips for taking beautiful food photos, equipment she uses, and her favorite RD food photographers! Rebecca will also be answering your questions in Part 3 of the series so be sure to comment your questions!
Have you been motivated to make a recipe after seeing it on a beautiful food blog or after seeing a beautiful food photo online? These beautiful photos make cooking seem approachable, even complicated baked goods… only to turn out nothing like they look in the photos. This isn’t about making complicated recipes look easier than they really are, but about how dietitians can improve food photography skills to show consumers how delicious different foods can look & imply how great they taste. It’s a way to promote your nutrition philosophy and encourage healthful eating.
Great food photography skills can obviously be used on food blogs, but they can also help you show students the delicious food being served in the cafeteria at school, or showcase healthy options at hospital cafeterias, workplace cafeterias, and other locations. If you want to promote healthful eating and show how yummy your food is, learning a few basic photography skills will get you on your way to draw people in to try that food and also educate the public.
In this post, I’ll be sharing how I became a dietitian food photographer and I’ll share 3 general tips to get started. Over the next couple weeks, keep an eye out for 5 game changing photography tips, basic equipment you’ll need to get started, and last but not least, what other RDs are doing with their photography skills. Enjoy!

Ok, so now I’d like to quickly introduce myself. My name is Rebecca, I’m a Salt Lake based RD, and I own Nourish Nutrition Co. I started my nutrition business about 4 years ago and currently help people cook for one. I am a freelance food photographer/videographer as well, and actually, that’s where a majority of my current income is from. I started my business when I couldn’t find a good full-time job after finishing up grad school. In fact, I started my very first blog after finishing my internship and not being able to find a full-time job. Plan B has been awesome for me.
I became interested in photography when I started my first food blog. I had a fancy (or what I thought was fancy) DSLR camera, I’d practiced general photography, and was excited to show the world my excellent photo skills on my blog. I wrote about the experience in a post on my biggest food photography mistakes, you can read it here.
Here are 3 general tips I share when asked about becoming a food photographer:
- Just get started. Seriously, how often do you hear this tip? All the time. That’s because it’s so important, yet hard to actually do. You won’t be a good photographer when you start. But that doesn’t mean that you can’t become one. Use the equipment that you have (a camera phone is a great place to start), know you won’t be great, but just get behind the lens.
- Learn how to take good photos. There are 2 ways to do this. If you want to learn fast & efficiently, I highly recommend investing in a program/e-book. I created photography e-books & a course for nutrition professionals with Stephanie McKercher, a Colorado based RD. We focus on the basics and walk you through the process of learning how to take great photos. We start with lighting and going from there. The food blog, Pinch of Yum, has an e-book as well. In addition, Foodtography School is one I’ve used myself. But of course, there are lots more!
You can also learn it all on your own. This takes more time, but is a definite possibility. Check out books at your local library, google food photography, and learn on your own. The Bite Shot YouTube channel is incredibly helpful, Brooke Lark, a local SLC food photographer has great resources on her site, and I have a number of free food photography articles and resources on my blog, Nourish Nutrition Blog.
- Practice, Practice, Practice. Again, nothing new here, you can learn a lot of great concepts, but they won’t sink in until you get behind the lens. Either use your phone or a DSLR camera. Either works, both can get you great results. Regardless, you need to know how to use the light, your camera, and style effectively to get great shots with any type of camera. It’s like learning how to work with patients in your coursework and then actually going into a hospital during your internship. Your MNT classes really start to make sense when you start to see patients in the hospital.
Hopefully that gets you inspired to start working on your photography skills. Stay tuned for my 5 easiest tips to take beautiful photos. Spoiler alert: they’re simple, and perfect to get you started.

— Rebecca Clyde MS, RDN, CD is a Salt Lake based dietitian, food photographer and owner of Nourish Nutrition Co., as well as the current UAND Membership Chair.


